Friend of The Sociable, Matteo Granara (@mattedue), a System Integration Architect with Arekibo Digital, recently modified an original NES to turn Nintendo’s original console into a high tech HTPC.
We asked him why he did it and how he went about modifying a classic Nintendo to turn it into a Home Theatre PC.
What exactly did you do?
A workmate (@antoniegeerts) sent me a link to a similar project and I basically got carried away!
So after a couple of weeks researching for possible ways of fitting the components in the chassis in the most efficient way as possible I decided to give it a go. I wasn’t sure of the result so I didn’t buy all the components straightaway.
First I had to find an old NES. I still had one back home (at least I thought I had… I found out my parents gave it away because it was taking space…) but wouldn’t have had the heart of sacrificing it for this project. So I started looking around on eBay for a used/broken one. After a couple of weeks I found one (from Italy – hence the “Versione Italiana” writing). While I was waiting for it to be delivered I started thinking about the tools I would have needed: a Dremel, a sander, a glue gun, some spare parts from old PCs (power LED, power & reset buttons) and some screws.
Finally I received the parcel with the NES. The internals were a complete mess: rust and oxidation everywhere (the unit was supposed to work but I wasn’t sent the game nor the TV adapter so I couldn’t test it).
I wanted it to be a stable, neat & clean case. The other projects I saw online didn’t satisfy my requirements, so I took some ideas, but I went for a different approach. I started by marking the spots where the screws would have been (the other projects were mostly screw-less). It wasn’t easy with the tools I had but I eventually got it right.
How long did it take
It took me approx. 30h of work plus some research to see other people’s solutions. The duration of the project was heavily affected by the fact that I never used a Dremel before.
How did you do it?
I first disassembled the unit, then I cleaned the plastic parts with soap and finally fine-sanded & polished the parts that were stained by the usage.
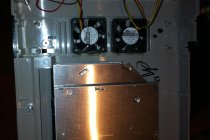
The second (and most dangerous) step is removing all the original internal mounting points that the NES had. I had to dremel off most of them to make sure that none of them occupied any space I needed for the components. I had to be careful here because some of them were used to hold the two parts of the chassis together.
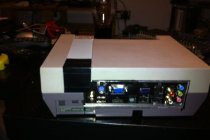
The next step was marking all the assembling points: the back grid (where the motherboard external connectors are), the mounting points for the motherboard and the screw holes for the hard disk.
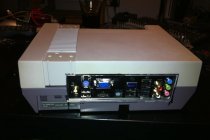
I wanted my NES-HTPC to use the original “Power” & “Reset” buttons and to have two frontal USB ports that resembled the old controllers’ ports. Some crafting was needed here. I managed to reuse the buttons without soldering anything and I replaced the original LED with another one I had (unfortunately it’s not red, but the yellow one fits well enough and it’s a bit more personal). The USB ports at the front instead required more work (approx. 4-5 hours). I had to but a PC card with 2 pairs of USB ports and cut them to fit my needs. One of the front ports happens to be under the motherboard (and works as additional support) so I had to do a precise job here. Dremeling silicon is not as easy as I thought (and it smells pretty badly when burnt).
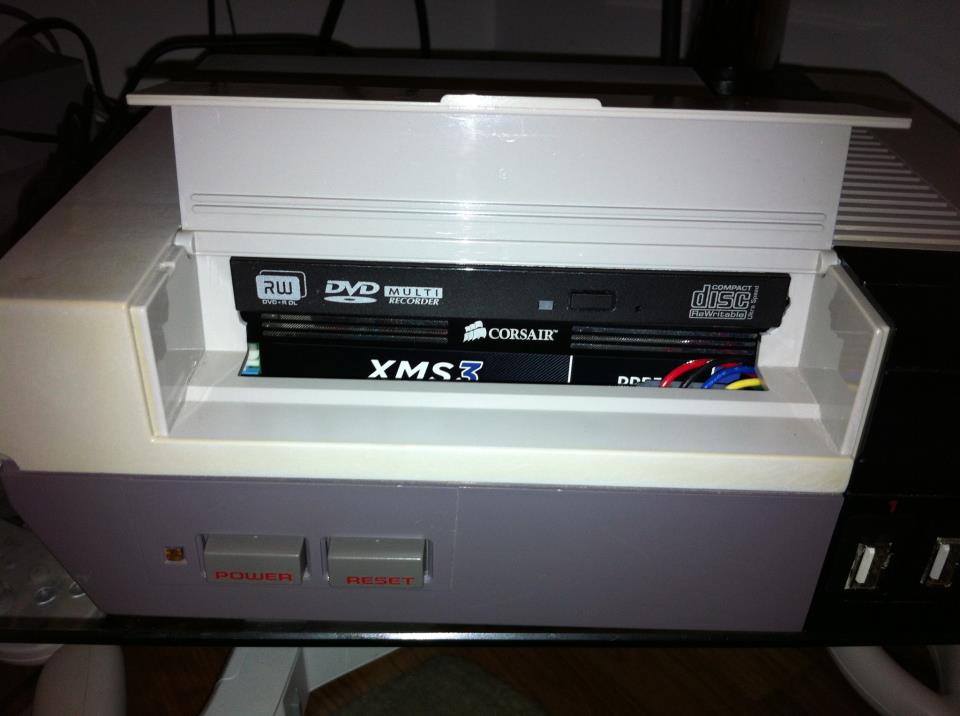
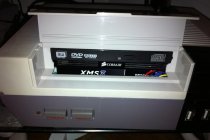
The front lid of the NES is basically its most recognisable trademark. It immediately made sense tome using it as cover for the DVD player. This was tricky again. I had to make some cuts on the side in order to fit a slim DVD player and I finally opted for Velcro to hold it to the upper part of the case. Hot glue was another option, but the Velcro gives me a chance to replace the part without messing up the case.
For the hard disk I finally opted for a 64GB SSD: I wanted something fast and disk space was not a concern (the unit boots up in less than 30 seconds and resumes in less than 5 from standby, which is pretty good). The HDD sits at the bottom (under the MoBo) and it’s held by two screws from the bottom (I’m really proud of this solution).
The fans were mandatory: I didn’t want any overheating problem. Every NES ships with a plastic cover at the bottom that was supposed to be used as expansion bay: fitting a 50mm fan in that space was an easy choice. Just to be sure I decided to use two additional 40mm fans to draw air inside the case (the bottom one pulls hot air outside). I simply decided to glue them under the original air intakes that exist on the top part of the case. I am aware that the way the air flows is not ideal (hot air should be pulled out from above and cool air should be pulled in from the bottom), but I had to make some calls due to assembling limitations I had. In the end there is no moving part (the HDD is SSD, not a standard one) and the HTPC is unlikely to heat up too much.
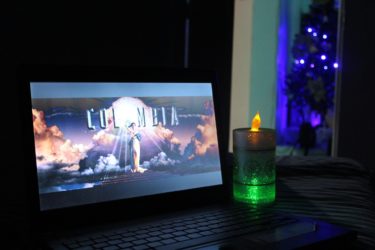
Time to fire it up: it all worked at the first try (I was surprised myself) and the only thing left to do was installing the OS. I originally wanted to opt for Windows 8, but windows media centre was not available for that, so I opted for Windows 7. I guess I will update it in the near future!
Specs:
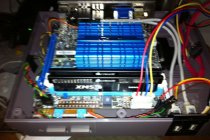
- ASUS AT3IONT-I Deluxe Motherboard
- 4 GB DDR3 Corsair RAM
- 64 GB SSD OCZ HDD
- DVD player & writer
-
- NES HTPC
-
- NES-HTPC
-
- NES-HTPC in construction
-
- Finished NES-HTPC
-
- Finished NES-HTPC
-
- NES-HTPC nearly finished
-

- NES-HTPC being built
-
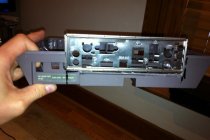
- NES-HTPC rear
-
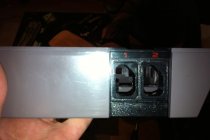
- NES-HTPC USB Controller ports